Saturday, February 4, 2012

A week or two ago, I posted a picture on Pinterest (i.e. crafter's crack) of a cute owl purse that I found on Craftster.org. Shortly after posting, I received a comment from one Miss Carmyn Egge that she wanted one. I sort of shrugged it off, not thinking much of it at the time. Cue thrift store trip 2 days ago, while at the store, I begin texting with her, and she again mentions that she wants the purse and asks if I'll make it for her while I'm "finding myself" (i.e. being a bit of a lazy bum and not working!). Since I was already at the store, I agreed and headed for the men's suits.

I found exactly 2 suit coats among probably 200 that were the pattern I wanted, and only one that was the color I was envisioning. So, I bought it, even though it wasn't quite as big as I was wanting (doesn't hurt to have some extra fabric in case you screw up a cut here or there). So, I drew up a pattern with some freezer paper-- if you sew, I highly recommend using freezer paper for patterns, as it is usually quite wide, it is relatively see through, nice and sturdy, and you can iron it right on to your fabric and cut around so no need for pins!

Of course, right as I was getting ready to prep my cut out pieces, my iron decided to stop working, so my sewing was delayed a day. Yesterday I got a new iron, sewed the lining, and began work on the appliqued front. Fortunately, I had all the other materials laying around... lots of felt from some misguided foray into stuffed animal making, tons of embroidery thread from various projects (some dating back to when I was a teenager and decided making friendship bracelets was cool), iron-on stabilizer (from who knows what), and lining fabric (I have kind of an embarrassing habit of buying fabric, whether I need it or not, and also of buying too much.)

Well, the results are quite satisfying, as you can see:
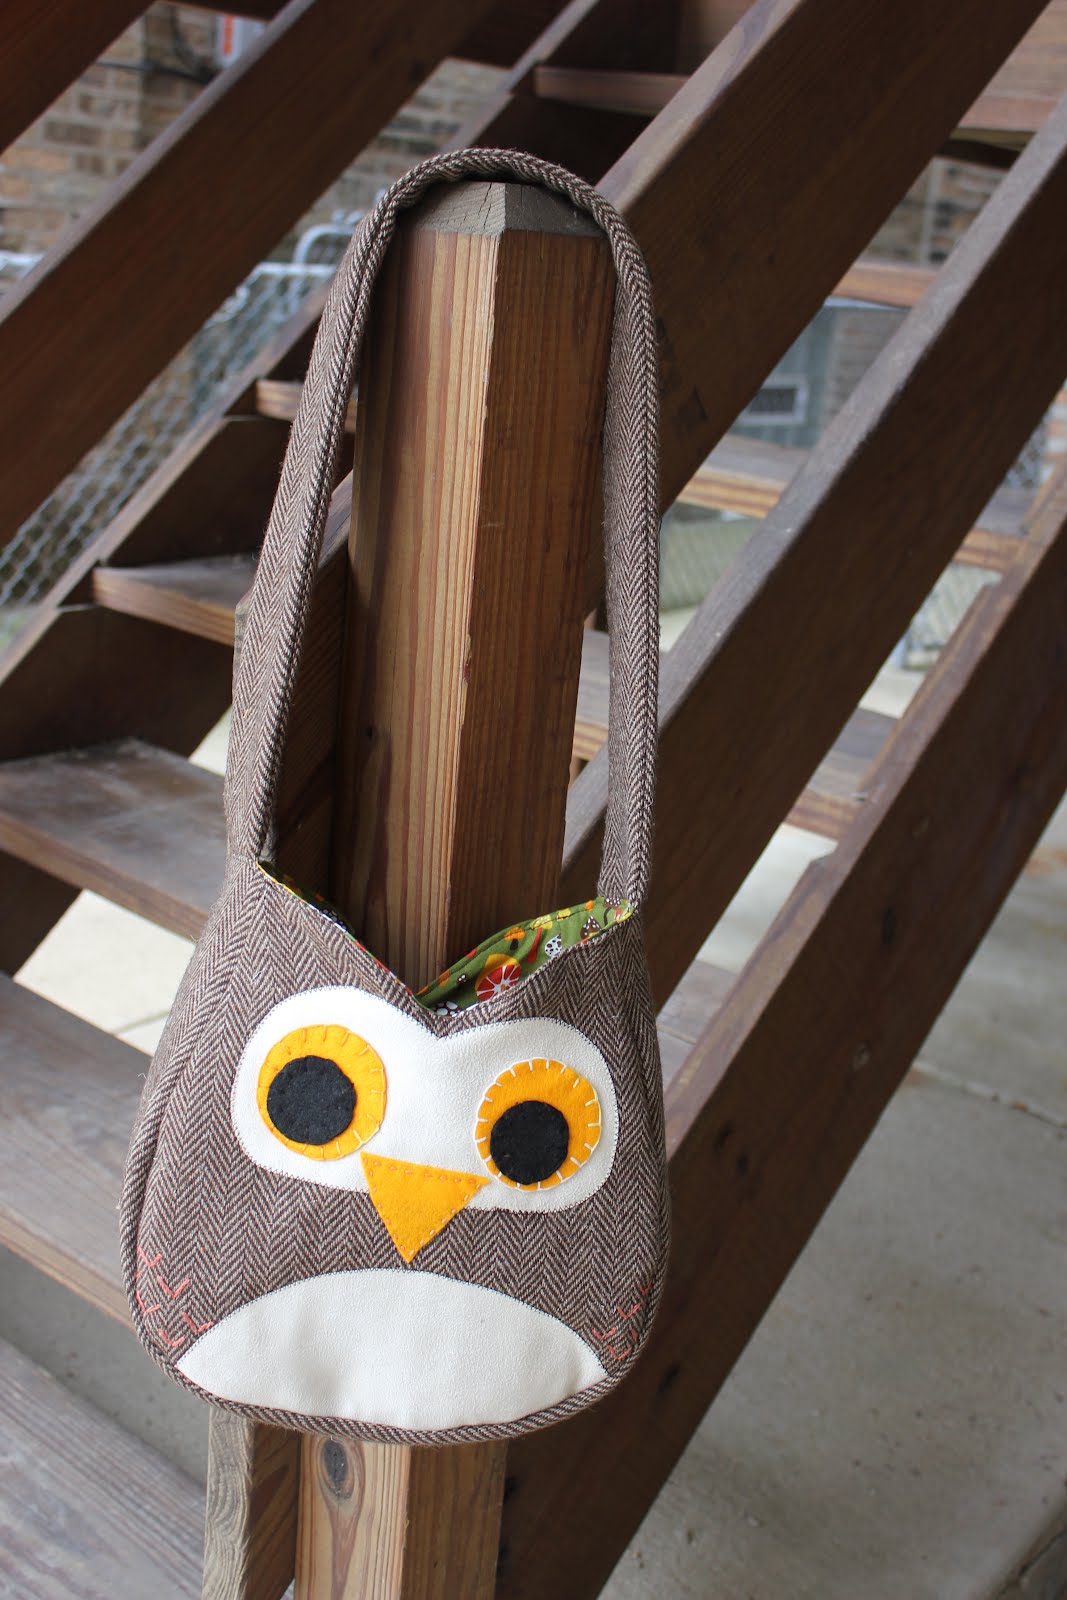

He's very adorable, if you ask me, and the liner fabric worked very well, and was totally "woodland" themed:

Mushrooms! I've already made a shopping bag and an apron out of this fabric, so it's gotten some use! And, it inspired the little applique on the back. I felt like the back of the owlie was a little boring with just the tweed, so I made a little pretty for it:

Another Mushroom! This bag was so fun to make. Now, it's off to the post office to mail to Miss Carmyn!

Friday, January 27, 2012

80's Cartoon Swap

So, as promised, the rest of the awesomeness from the 80's craft swap:


That's everything. I'm pleased with how it all turned out, I must admit. Close ups, now:

Beetlejuice Bag featuring Lydia and an awesome purple bow with a skull and crossbones button.
My Little Pony fleece blankie. This awesome fabric courtesy of a garage sale in Eugene, OR. Thanks, Auntie Carol!

Jem Artwork. Stickers over a notecard, painted black, and stickers pulled off. Easy Peasy and totally awesome!

She-Ra candle. Okay, it's totally naughty and sacrilegious, but it's also probably my favorite item I made! She-Ra, Lady of Etheria, with Kowl as the baby. :D

And the awesome last minute extra I found at a creepy little re-sale shop that had lots of comics and even more taxidermy.

Wednesday, January 25, 2012

Rainbow Brite!

When I was little, I LOVED Rainbow Brite. I had the doll and her horse, Starlite, and always wanted one of the Sprites. Anyway, I recently participated in an 80's Cartoon swap, and was hoping hoping hoping that my partner liked Rainbow Brite because I wanted, originally, to make legwarmers that looked like her awesome puffy boots! Well, My partner did like Rainbow Brite, but when I was trying to work out a pattern for legwarmers, they looked terrible, so I ended up scrapping that and did a quick search for some fingerless gloves. Lo and behold, others out there love the RB as much as I do, and I found this pattern. So, I spent probably close to an hour finding the right colors that went together, but which didn't look too "primary" or childish, and then set to work on them during my vacation in Oregon.
I was slightly confused at first, because these mitts are knit inside out for the wrist section, thus leading them to look like this as I was going along:

I had some serious doubts. I also wasn't paying attention to the pattern as much as I should and missed that I was to be decreasing every new section, so had to frog the entire cuff of my first one down to the green in order to fix that issue. Serves me right for not looking at the pattern. I also adjusted the pattern just a bit to increase the "bubble" effect on the wrist part, knitting for 8 rows and purling for 5 instead of 7 and 7.

Anyway, when it came time to turn the glove "right" side out, I was relieved to find that they looked exactly as I had wanted them to look!


Ignore the fact that you can see serious seams where I changed needles. That is a personal knitting problem that I have yet to fix, but which I have learned to remedy when sewing in ends and making final adjustments. :)

The pattern called for some color work in the hand to knit in a yellow star. I suck at color work. I hate color work. I decided not to do the darn yellow color work star on the blue background and told myself I'd figure it out later. So, here is the final product-- sans star.

But, somehow, it just wasn't right without the little star on the hand, so I decided to cut a star out of felt and sew it on with blanket stitch. I found a halloween cookie cutter in the shape of a star which was exactly the right size, so didn't have to struggle with my terrible star drawing skills! Here they are with the stars:


So cute, right!? I was sort of sad to part with them, but since my swap partner had told me she has had past bad swapping experiences, I felt like maybe these and the other awesome stuff I sent her would help to make up for the crappy times in the past. Once she receives the package, I'll post another blog with all the awesome 80's items in it. :)

Sunday, January 1, 2012

New Year, New Hat

So, for Christmas, Paul got me what I really wanted... a brand spankin' new camera. And it's super fancy, so much so that I have only figured out about a quarter of what it can do! I need to take an SLR class so that I can figure out how to do more neat things with it! Anyway, it's improved my picture quality immensely, so here is a little sneak peak at a hat that I made today.

Seriously, this picture was a point and click of myself. And it turned out this good? This camera is amazing. But the hat! It's a super easy knit, bulky yarn, big needles. Here is the link: Weekend Head Warmer It only took me about an hour and a half to finish and looks great.

It's a big waffle pattern so it scrunches nicely. The picture shows it scrunchier on top (i.e. it looks longer) but I'm pretty sure I have a really long head, so that might be why mine looks more beanie-esque. Either way, it's really comfy and can be pulled back somewhat for a slouchier look, or pulled down over the ears for more of a beanie look and super warmth! Enjoy the hat, and my much better picture quality!